How to Extend Wi-Fi Coverage with a Wireless Access Point
In an era where internet connectivity is paramount, a strong and reliable Wi-Fi signal is no longer just a luxury—it’s a necessity. Whether you’re working from home, enjoying your favorite streaming service, or connecting multiple smart devices, having consistent Wi-Fi coverage throughout your space is crucial. Unfortunately, many households and offices face challenges related to weak signals and dead zones that can hinder productivity and enjoyment. If you’ve experienced frustrating Wi-Fi dead spots, you’re not alone. Thankfully, there is an effective solution: utilizing a wireless access point (WAP) to extend your Wi-Fi coverage.
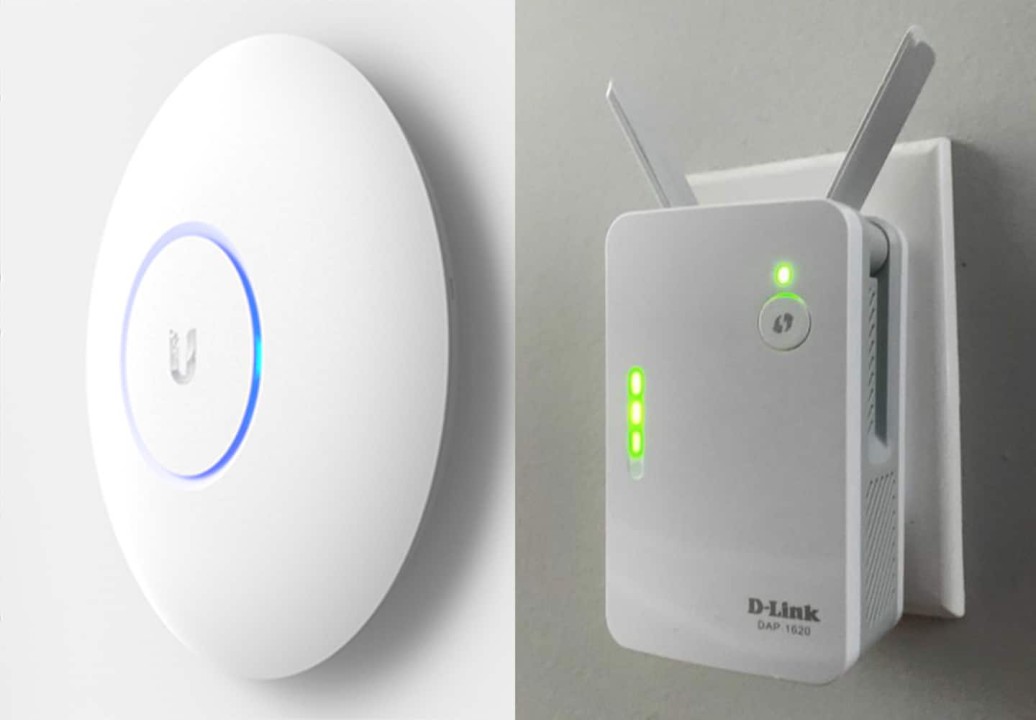
A wireless access point acts as a bridge between your existing network and your devices, enhancing coverage and allowing multiple devices to connect wirelessly. WAPs are particularly useful in larger homes, multi-story buildings, or environments filled with obstacles that could interfere with wireless signals. They provide an opportunity to enhance your existing network, ensuring that every corner of your space receives a robust signal, eliminating frustrating connectivity issues. This guide will provide insights on how to extend your Wi-Fi coverage using a wireless access point effectively.
Understanding the technicalities surrounding wireless networking can appear daunting, especially for those who may not be familiar with networking equipment. However, setting up a wireless access point is a straightforward process when broken down into manageable steps. This article will delve into the necessary steps and best practices for integrating a WAP into your network, including selecting the right location, configuring the device, and optimizing it for top performance.
With the promise of enhanced connectivity and a more enjoyable online experience, let’s explore how to extend Wi-Fi coverage with a wireless access point. Say goodbye to dead zones and hello to seamless browsing, streaming, and gaming throughout your home or office.
Selecting the Right Wireless Access Point
Before diving into the setup process, it’s crucial to start with selecting the right wireless access point for your needs. Not all WAPs are created equal; they come with different features, specifications, and pricing models. When considering which model to purchase, assess factors such as coverage area, speed capabilities, and the number of devices that will connect to the network.
When evaluating a wireless access point, begin by considering the **Wi-Fi standard** it supports. In 2024, the latest standard is Wi-Fi 6 (802.11ax), which offers faster speeds and improved efficiency in congested environments. If your router supports Wi-Fi 6, investing in a compatible WAP will enhance your overall network performance. Moreover, check for dual-band functionality, which allows the WAP to operate on both 2.4 GHz and 5 GHz bands, providing flexibility in terms of device connectivity and performance.
Another essential aspect to consider is the **coverage range** of the access point. Look for models with significant range capabilities to ensure they can effectively cover the desired areas of your home or office. Manufacturer specifications often provide information on ideal coverage areas, helping you make an informed decision. Additionally, consider any physical obstacles between the WAP and the devices it will connect to, as walls, furniture, and other barriers can impact signal strength.
Installing Your Wireless Access Point
Once you’ve selected the right wireless access point, the next step is the installation process. While this may vary slightly depending on the specific model, the general approach is quite similar across devices. Start by determining the ideal location for your WAP, aiming for a central position within your coverage area for maximum effectiveness.
Choosing the proper location is vital to achieving optimal signal strength and coverage. For best results, place the WAP in an elevated position, free from obstructions such as walls and heavy furniture that could impede the signal. If possible, locate it in a central area of your home or office to ensure an even distribution of coverage. Conducting a preliminary site survey with your smartphone or a Wi-Fi analyzer app can help identify weak signal areas and determine the best placement for the WAP.
Once you have chosen the location, connect the Ethernet cable from your router to the wireless access point’s LAN port. Power on the WAP and wait for it to boot up completely. If your WAP supports Power over Ethernet (PoE), you can connect the device to a PoE switch or injector, eliminating the need for a separate power outlet. After the physical setup is complete, you’ll be ready to configure your wireless access point to integrate it seamlessly into your existing network.
Configuring Your Wireless Access Point
With the hardware installed, the next vital step is configuring the wireless access point. To do this, connect your computer or mobile device directly to the WAP’s network. Open a web browser and enter the WAP’s default IP address, typically found in the user manual or on a sticker on the device. Logging in will often require a default username and password provided in the documentation.
Once logged in, you can begin configuring the WAP settings. Start by changing the default username and password to enhance security. Default credentials are widely known, making it easy for anyone to gain unauthorized access to your network. After securing your login, you can configure the basic wireless settings, including selecting the SSID (network name) and establishing a secure encryption method—ideally WPA2 or WPA3 for modern security.
Additionally, consider adjusting the channel settings to minimize interference from neighboring networks. Your WAP may automatically choose a channel, but manually selecting a less congested channel can significantly improve your signal quality. Review features such as QoS (Quality of Service), which prioritizes bandwidth for critical applications like video calls or online gaming. This configuration ensures that your streaming and gaming needs are met without delays or interruptions. After making these configurations, save your settings and reboot the WAP to apply changes.
Optimizing Wi-Fi Coverage with Advanced Settings
After successfully configuring the WAP, optimizing its settings can further enhance your Wi-Fi coverage. Some advanced features can help tailor the setup to the specific needs of your household or office. One of the most effective strategies is to enable band steering. This feature helps devices automatically connect to the best band available—2.4 GHz for extended range or 5 GHz for higher speeds—based on their capabilities and distance from the access point.
Another optimization technique involves adjusting the transmit power settings. Most access points allow users to configure the transmission power of the wireless signal. If your WAP is primarily servicing a small area, reducing the transmit power can help prevent unwanted interference from overlapping with neighboring signals. On the other hand, maximizing transmit power may be beneficial in larger spaces where you want to ensure thorough coverage in every corner.
Lastly, keep an eye on connected devices and their usage. Monitor which devices are consuming the most bandwidth and consider upgrading or replacing older devices that may drag down the network performance. Some WAPs allow you to manage connected devices directly from their admin interface, enabling you to disconnect unwanted connections and prioritize important ones. Regularly updating the firmware of your WAP is also a crucial part of maintaining optimal performance, as manufacturers frequently release updates that enhance security and improve functionality.
Conclusion
Extending your Wi-Fi coverage with a wireless access point is a powerful way to enhance your home’s or office’s internet connectivity. Throughout this article, we have explored the essential steps needed to select, install, configure, and optimize a WAP to eliminate dead zones and ensure a strong connection wherever you need it. By understanding the features and advancements available in modern wireless access points, you are well-equipped to create a network that meets the diverse needs of all users and devices.
Investing time and resources into a wireless access point can have significant returns in terms of better connectivity and less frustration. Whether you’re a remote worker needing reliable internet for video conferencing, a gamer looking for low-latency gameplay, or a family wanting to stream movies without interruptions, a properly configured WAP will elevate your overall experience. Furthermore, the ability to manage bandwidth wisely through features like QoS and monitoring helps tailor your network to ensure every device operates efficiently.
In the rapidly evolving world of technology, staying informed and proactive in maintaining your network is critical. Regular reviews of your WAP’s
performance and settings can help you adapt to changing demands or add new devices over time. By following the strategies outlined in this guide, you can ensure that you’re maximizing your wireless access point’s potential, providing robust, reliable Wi-Fi coverage that keeps your home or office connected. Free yourself from the shackles of weak signals and the frustration of dead zones—invest in a wireless access point and take control of your connectivity today.


